Installing OpenOffice.org
Start an OpenOffice.org application for the first time
Open files and documents
Exporting documents
Export document as a PDF A-1 Archival file
Select image compression settings when exporting documents to PDF
Select the page range for export as a PDF file
Export document as a PDF file tagged for accessibility
Export document as a PDF file with notes
Using the Quickstarter
Enable the quickstarter
Enable the loading of the quickstarter on startup
Disable the quickstarter
Disable the loading of the quickstarter on startup
Exit the quickstarter
Open an OpenOffice application using the quickstarter
Create a new document from a template using the quickstarter
Open a saved document using the quickstarter
Using Menusglossary-term marker
Using Toolbarsglossary-term marker
Detach toolbar window
Dock toolbar window on any border
Dock toolbar window at recent position
Resize toolbar window
Access the excess buttons in the toolbar
Hide a toolbar button
Hide a toolbar button using the customize dialog window
View hidden toolbar buttons
View hidden toolbar buttons using the customize dialog window
Change a button’s position in the toolbar
View toolbar buttons as icons only
View toolbar buttons as text only
View toolbar buttons as text and icons
Reset toolbar buttons to default values
Access the extra buttons in the toolbar (with bug report)
Save toolbar changes to a document or template (with bug report)
Using Styles
Open the styles and formatting window
Open the styles and formatting window using the toolbar
Close the styles and formatting window
Assign a character style
Assign a list style
Assign a list style to a list item
Assign a paragraph style
Use the fill format mode to assign a style
Filter the different styles in the styles and formatting window
Filter or select the character styles in the styles and formatting window
Filter or select the frame styles in the styles and formatting window
Filter or select the list styles in the styles and formatting window
Filter or select the page styles in the styles and formatting window
Filter or select the paragraph styles in the styles and formatting window
Modify a style’s font and font size
Modify a style’s font color
Modify a style’s line spacing
Modify a style’s paragraph spacing
Modify a style’s paragraph indentations
Modify a paragraph style’s alignment
Add or Modify a paragraph style’s border
Add or Modify a paragraph style’s shadow
Modify a paragraph style’s shadow to merge with next paragraphs
Modify the line options for a graphic style
Overview of character style options
Overview of frame style options
Overview of graphic style options
Overview of list style options
Overview of page style options
Overview of paragraph style options
Overview of presentation style options
Create a new style using selected text
Create a new style using the drag and drop method
Link styles using the style organizer
Set the next style using the style organizer
Update the formatting of a style and apply it
Using Keyboard shortcutsglossary-term marker
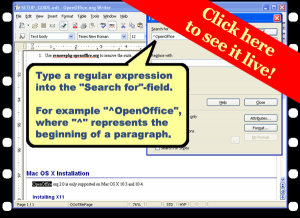
How to find Help
View “About OpenOffice.org” window
View the version release number of OpenOffice.org
Save As…
Print
Page Previews
Preview a page in full screen
Go to the first or last page while at the page preview
Go to the next or previous pages while at the page preview
Zoom-in at the page preview
Zoom-out at the page preview
Close/Exit
Tweaking Options
Enable the first character capitalization auto correct feature
Disable the first character capitalization auto correct feature
Enable the auto correction feature for two initial capital characters
Disable the auto correction feature for two initial capital characters
Set memory options to improve application performance and responsiveness
Enable and choose a Java Runtime Environment for OpenOffice.org
Disable Java Runtime Environment for OpenOffice.org
Edit the author field value
Disable the warning when not saving in the default file format
Disable the warning when not saving in the default file format using the dialog window
Enable the warning when not saving in the default file format
Set the Auto Save/Recovery time interval
Display the gallery
Display the media player
Installing OpenOffice.org
Download OpenOffice.org for Windows
Installing OpenOffice.org on Windows
Upgrade OpenOffice.org to release version 2.2 on Windows
Upgrade OpenOffice.org to release version 2.3 on Windows
Install or Upgrade OpenOffice.org to release version 2.4 on Windows
Check for OpenOffice.org updates and download them
Next, Getting Started